Hiking with arthritis isn’t a barrier, it’s a puzzle you can solve with the right approach. Your joints need specific preparation before you hit the trail.
The good news? You don’t have to abandon outdoor adventures.
Discover which trails work for your body, what gear actually matters, and how to stay pain-free during your hike.
Understand Your Arthritis Before You Hike

Before you lace up your hiking boots, it’s worth understanding what’s actually happening in your joints. Osteoarthritis breaks down cartilage in your knees and other joints, causing stiffness and pain during weight-bearing activities.
You’ll experience swelling and reduced mobility, especially on steep terrain.
Get a physical therapist assessment first. They’ll identify your specific limitations and strengths, letting you hike smarter.
A physical therapist assessment identifies your specific limitations and strengths, letting you hike smarter.
Understanding your pain awareness matters too; know your pain thresholds before hitting the trail. This knowledge protects your joint health long-term.
Regular hiking actually helps maintain mobility when done right, reducing stiffness over time.
Assess Your Current Fitness Level and Joint Capacity
Now that you understand what’s happening in your joints, it’s time to figure out where you actually stand physically. A fitness evaluation from a physical therapist reveals your knee flexibility and specific capabilities.
They’ll identify what you can handle and where you need support.
Monitor your pain levels during everyday activities: stairs, walking, sitting. Track how long you can move comfortably.
This baseline matters because it guides your trail selection. You’ll know exactly which hikes match your current abilities.
Gradually building intensity prevents flare-ups. You’re taking control of your hiking future by honestly evaluating where you’re right now.
Choose Low-Impact Trails That Match Your Knees
Your trail choice makes or breaks your hiking experience when you’ve got arthritis.
Your trail choice makes or breaks your hiking experience when you’ve got arthritis.
You’ll want to research trails beforehand using hiking resources and local guides that specifically highlight low-impact options.
Look for routes with gentle inclines and well-maintained surfaces that won’t stress your knees.
Consider these trail features:
- Flat terrain with minimal elevation changes
- Packed dirt or paved surfaces instead of rocky paths
- Shorter distances allowing frequent rest stops
- Shaded sections for comfortable breaks
Match your trail selection to your actual fitness level.
Steep or uneven paths aggravate joint pain and tire you quickly.
Shorter, flatter trails let you enjoy nature while protecting your joints from unnecessary strain.
Wearing proper footwear designed for stability and support is especially important when managing arthritis on the trail.
Essential Gear: Shoes, Poles, and Joint Support
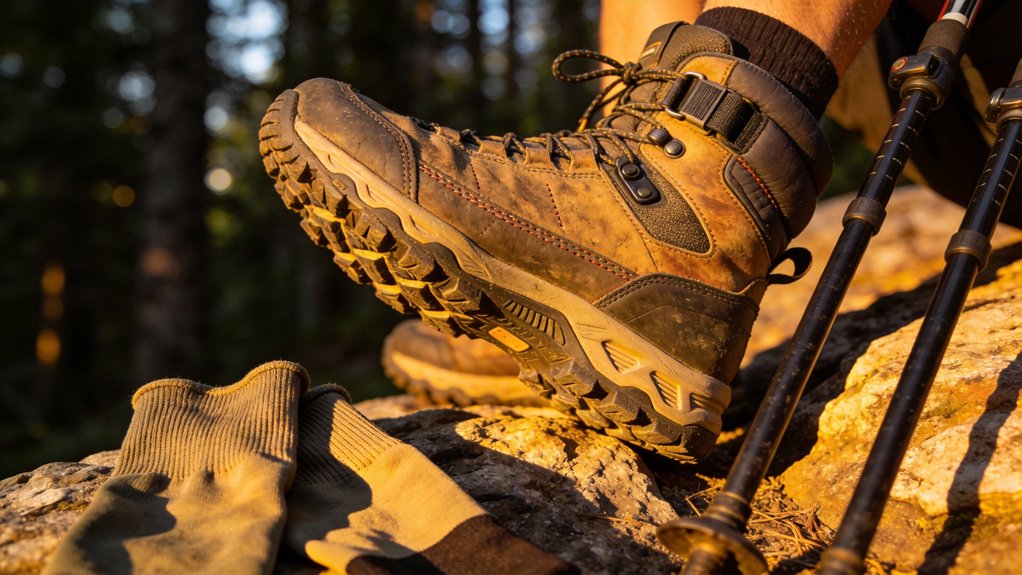
Once you’ve picked a trail that won’t punish your joints, what you wear on your feet and how you support your body become just as important.
Invest in hiking shoes or boots with ample cushioning and a wide toe box to reduce pressure on your knees and hips. Properly fitted footwear features prevent blisters and discomfort. Replace your hiking footwear when the cushioning becomes worn to maintain adequate joint support and protection.
Add orthotic inserts for extra arch support if you need them.
Trekking pole types vary, but two poles distribute your weight evenly across your body.
Consider flexible knee braces too.
These tools work together to keep you moving safely.
Prepare Your Joints: Warm-Up and Stretching Routines
Before you hit the trail, getting your joints ready makes a real difference in how you feel during and after your hike. A solid warm-up boosts blood flow to your muscles and joints, cutting injury risk and stiffness.
Dynamic stretches like leg swings and arm circles prep your body for movement and improve joint mobility.
After warming up, target your legs, hips, and back with static stretches:
- Quadriceps stretches to ease thigh tension
- Hamstring stretches for the back of your legs
- Hip flexor stretches for deeper movement
- Lower back stretches for spine flexibility
Regular stretching keeps your joints healthy and builds hiking endurance over time.
Manage Pain on the Trail and Prevent Flare-Ups
Now that you’ve warmed up and stretched, managing pain during your actual hike becomes the next focus. Use heat or cold therapy and over-the-counter pain relievers before you hit the trail.
These hiking tips reduce discomfort considerably. Take regular breaks every 20-30 minutes to rest your joints.
Regular breaks every 20-30 minutes during your hike give your joints essential rest and significantly reduce discomfort.
Practice mindfulness to shift your attention away from pain signals. Pace yourself deliberately rather than rushing.
Stay hydrated throughout your hike. Gradual intensity increases build endurance while preventing flare-ups.
Choose trails matching your fitness level, avoiding steep or uneven terrain. These pain relief strategies keep you moving safely and comfortably.